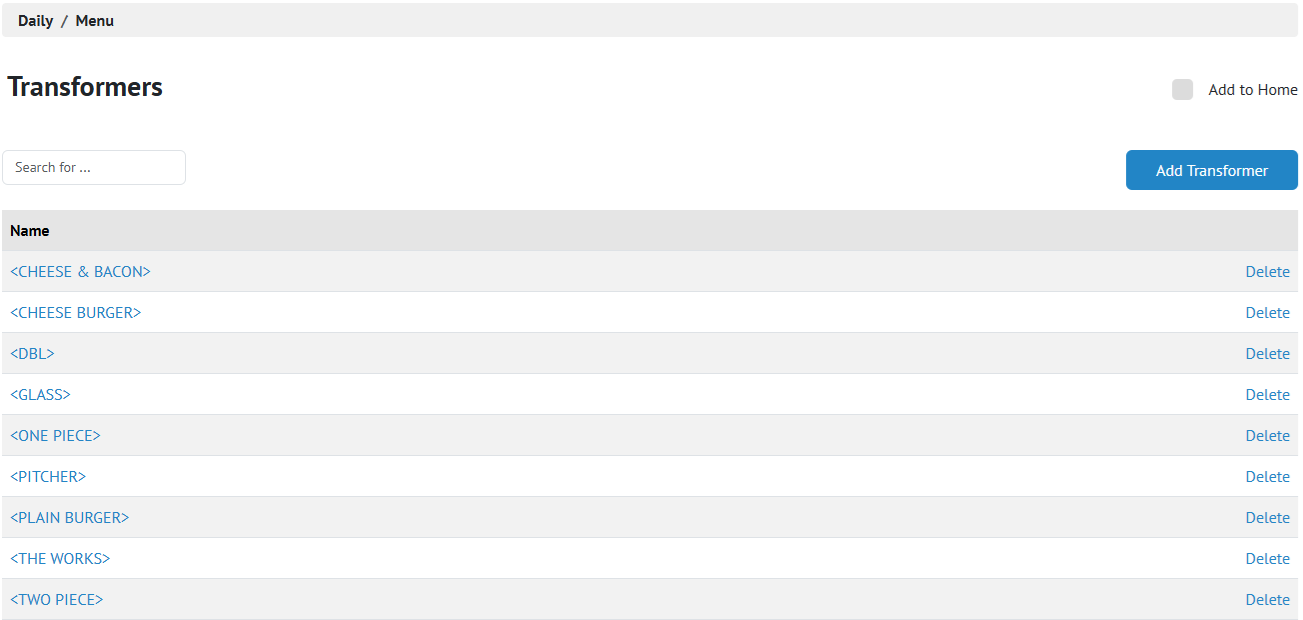
Creating Transformers
A transformer changes one menu entry into another. Transformers are used to save space on menu screens. For example, without transformers, draft beer that is served by the glass, pint, and pitcher would be listed three times for each brand to accommodate all sizes. Instead, a transformer for <GLASS> and a transformer for <PITCHER> are placed on the screen along with each draft beer sold by the pint, which is the most common and default size.
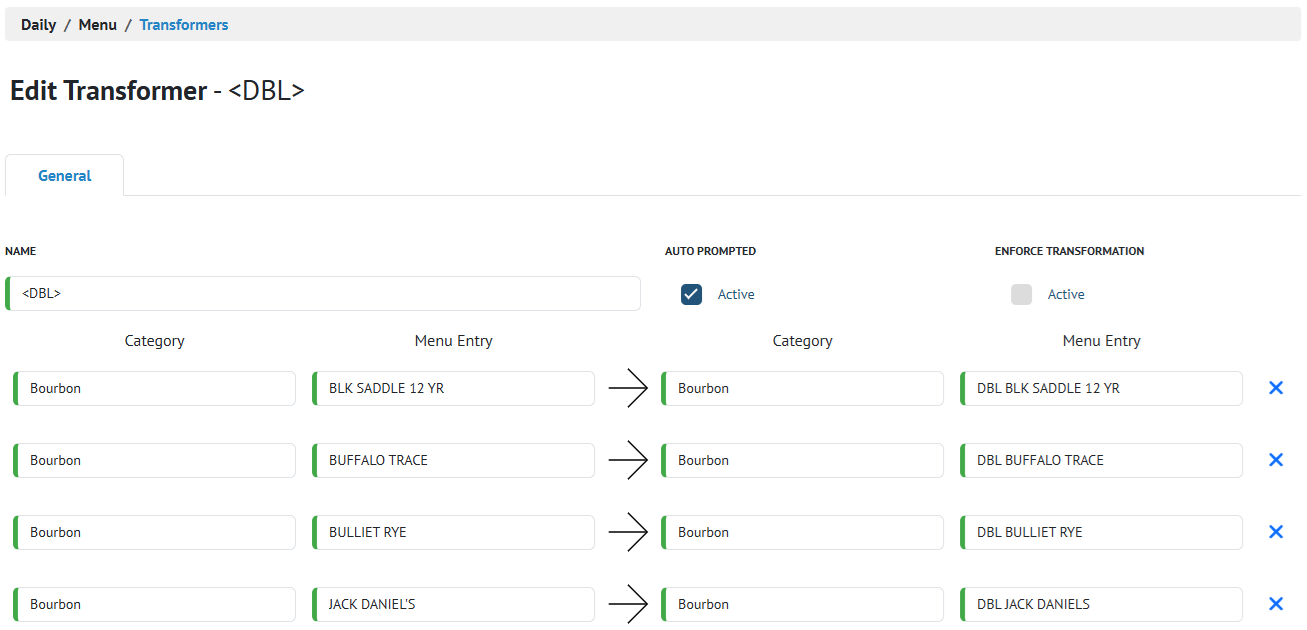
Transformers are links between two menu items. For transformers to work, both menu items must be configured in menu entry setup. For example, to configure the <GLASS> and <PITCHER> transformers, a PINT OF BEER (default order size, menu entry), a GLASS OF BEER (menu entry to transform to), and a PITCHER OF BEER (menu entry to transform to) must also be configured. These items are linked together on the Transformers page.
Transformers that have already been created can also be added to an item in menu entry setup. Transformer buttons can be added to a screen in the menu screen setup page.
NOTE: If there are multiple transformers for the same original item, the transformed item must be linked to the other transformed item so employees can correct mistakenly transformed items at POS. For example, if a PINT OF BEER can be transformed to a GLASS OF BEER or a PITCHER OF BEER, then the GLASS OF BEER and PITCHER OF BEER must also be linked.
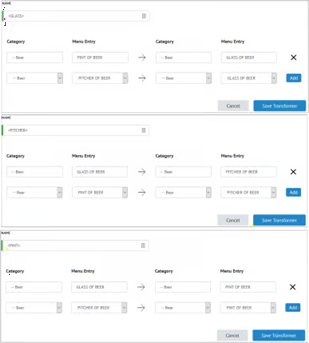
On the Daily Setup > Menu screen, click Transformers. The Transformers page appears. Click Add Transformer. The Add Transformer page appears.
Under the General Tab
- In the Name field, enter the name of the transformer (e.g. <PITCHER>). As a best practice, transformer names should be entered in brackets to avoid mistaking them for menu entries.
- In the Category field on the left, select the category of the menu entry to be transformed (e.g. Beer).
- In the Menu Entry field on the left, select the menu entry to be transformed (e.g. PINT OF BEER).
- In the Category field on the right, select the category of the menu entry the transformed item will transform into (e.g. Beer).
- In the Menu Entry field on the right, select the menu entry the transformed item will transform into (e.g. PITCHER OF BEER).
- Click Add to save the transformer link.
- Enable or leave disabled the AUTO PROMPTED flag. This flag is disabled by default.
- Disabled: Default behavior. The transformer screen will not appear automatically when ordering an item linked with the transformer. To apply a transformer, users will need to navigate to and apply the transformer after ordering the menu item.
- Enabled: The transformer screen will appear automatically when ordering an item linked with this transformer.
NOTE: If an item is linked to a mix of auto-prompted and non-auto-prompted transformers, the transformer screen will still automatically appear when ordering an item. However, this screen will only contain the auto-prompted transformers linked with the item.
- Enable or leave disabled the ENFORCE TRANSFORMATION flag. This flag is disabled by default and is only available when AUTO PROMPTED is active.
- Disabled: Default behavior. The No Transformation option remains available at the POS. Employees may bypass the transformer when ordering.
- Enabled: The No Transformation option is removed at the POS. Employees must select a transformed item or cancel before proceeding.
Click Save Transformer.
Repeat steps 1–8 for other transformers.