Adding Messages in the Communication Center
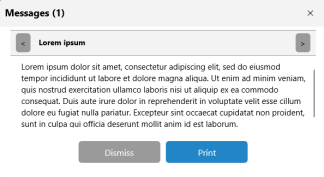
Management can communicate with staff via a POS messaging system. You can control when the messages display, in which department groups, and to which employees.
The Add Message page consists of a General, User Roles, Department Groups, and Scheduling tab.
- Navigate to Advanced Setup > Communication Center.
- Click Add Message.
- The Add Message page appears with the General tab active. Remain on the General tab.
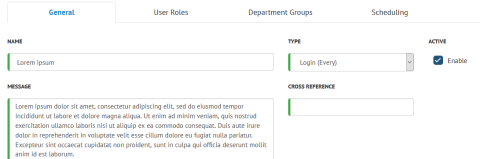
- In the Name field, enter a name for the message.
- In the Type field, select an event. The message will appear at POS whenever the selected event occurs. Select between Cashout, Login (Every), Login (First), Punch In, or Punch Out.
- Enable the Active flag.
- In the Message field, enter the message that should appear at POS.
- (Optional) In the Cross Reference field, enter a cross reference number for the message.
- Click the User Roles tab. Select the User Roles that should see the message.

- Click the Department Groups tab. Select the Department Groups that should display the message.

- Click the Scheduling tab. Select between Always (the message will always appear if the other conditions are met), Weekly (set a time period for each day of the week), or Specific (set a specific date and time range).