Adding Payment Types
The Add Payment page is where payment types are configured.
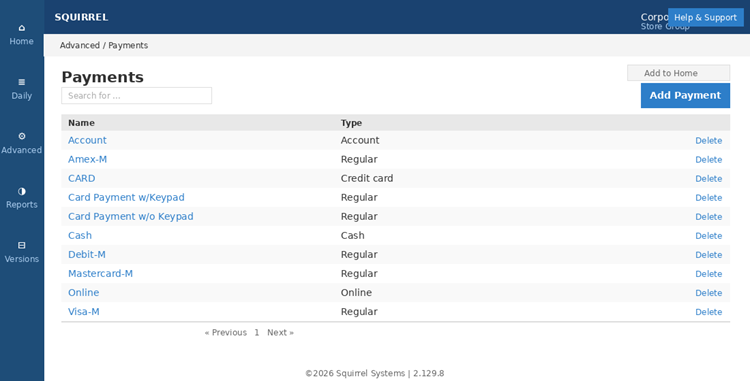
Advanced Setup > Payments — click Add Payment to create a new payment type
On the Advanced Setup > Payments screen, click Add Payment. The Add Payment page appears.
Under the General Tab
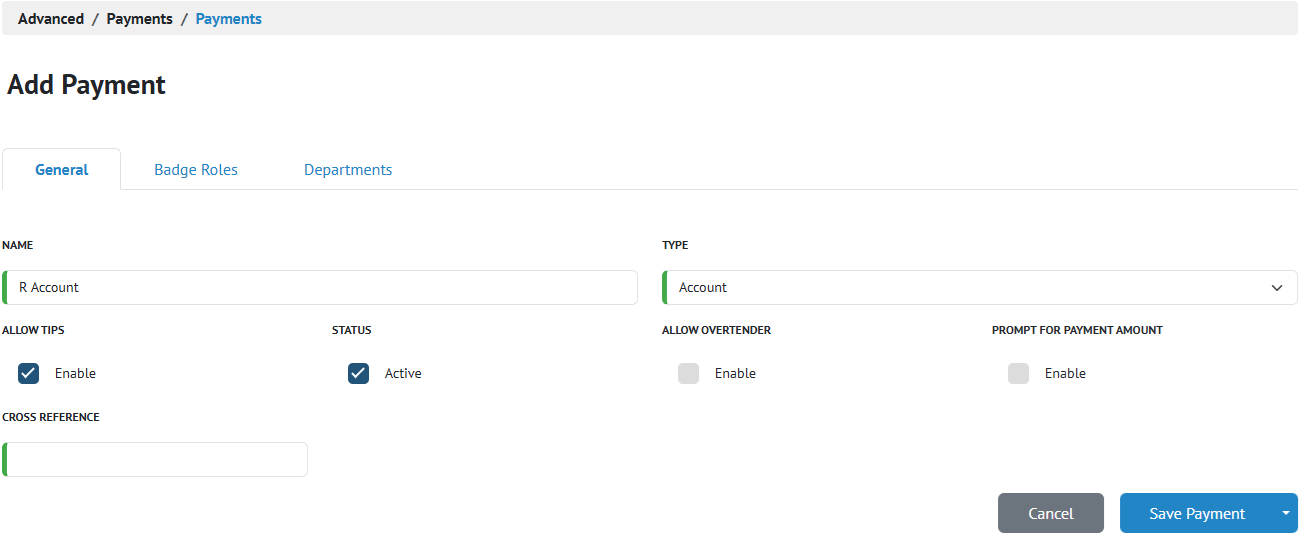
Add Payment — General Tab with Prompt for Payment Amount enabled
- In the Name field, enter a name for the payment. This name will appear at POS, on receipts, and in reports.
- In the Type field, select the payment type.
- Account: prompts for an account number at POS.
- City Ledger: is intended as an account for Hotel sites; it prompts for a city ledger account number (can be alphanumeric).
- Credit Card: payments configured as CREDIT CARDS are used with an integrated payment processor.
- Debit Card: this payment type is intended for use with Tethered Debit systems only. Payments configured as DEBIT are used with an integrated payment processor.
- Gift Card: Gift Card types are used with an integrated gift card provider.
- Regular: allows you to configure a payment that is not considered any of the above payment types, e.g. a check.
- Room: is intended as a room charge for Hotel sites; it prompts for a room number.
NOTE: The Online payment type cannot be selected at POS. It is used by online ordering integrations.
Below you will find optional fields that can be configured to suit your operational needs.
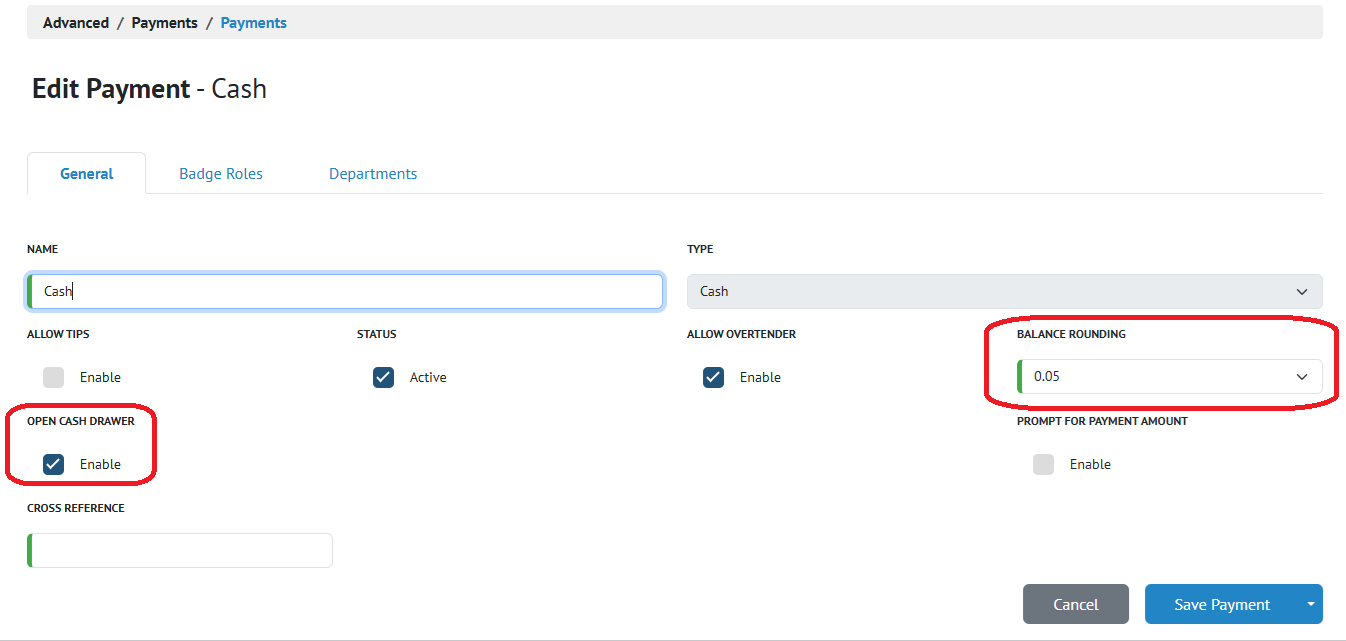
Some fields only appear for the Cash payment method.
- Enable the Allow Tips flag if the tip prompt should appear when the payment method is selected at POS.
- The Allow Overtender flag enables the ability to enter a dollar value higher than the total of the check when using this payment method. This flag is forcibly enabled for the Cash payment type, and forcibly disabled for the Debit and Credit payment types. The Regular, Account, City Ledger, Online, and Room payment types have this flag disabled by default, but can have the flag enabled.
- When disabled: once the full check total is satisfied, the check closes automatically at POS — no Finish step is required.
- When enabled: the Finish step is displayed at POS, allowing the cashier to confirm the tendered amount and any change due.
- The Balance Rounding field (Cash only) allows you to select a rounding value for currencies where the smallest coin is larger than the smallest unit of currency. For example, if rounding is set to 0.05 and a check total is $9.97, the cash amount due rounds to $9.95. Reports automatically show the rounding activity that has taken place.
- The Open Cash Drawer flag (Cash only), when enabled, signals the cash drawer to open when a check is settled to this payment method.
- Enable the Prompt for Payment Amount flag if a keypad should appear at POS after this payment type is selected, allowing the cashier to enter or confirm the payment amount. This flag is disabled by default. When disabled, the payment amount defaults to the full check total and the keypad step is skipped, expediting checkout.
- Cross Reference: enter a cross-reference number.
NOTE: For the Cash payment type, Allow Overtender is always enabled. The Finish step is always required for Cash payments so that change due can be displayed, regardless of the Prompt for Payment Amount setting.
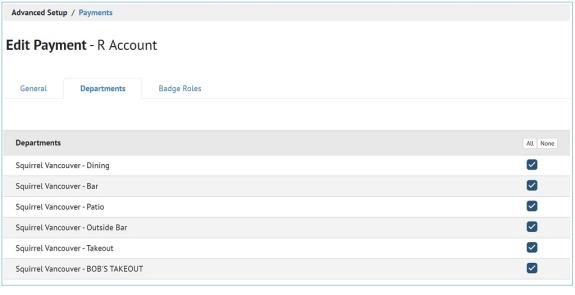
Under the Departments Tab
Select the departments you would like this payment type enabled or disabled for. The default is disabled.
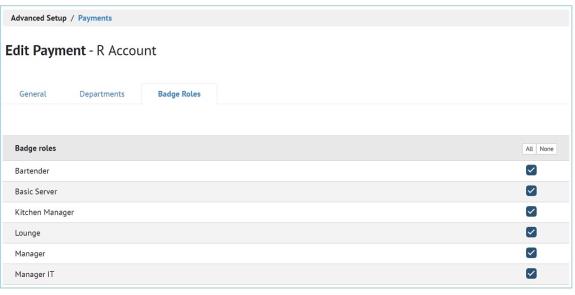
Under the Badge Roles Tab
Select the badge roles you would like this payment type enabled or disabled for. The default is disabled.
Click Save Payment.
Payment Screens
On the Advanced Setup > Payments > Payment Screens screen, click Add Payment Screen. The Add Payment Screen page appears.
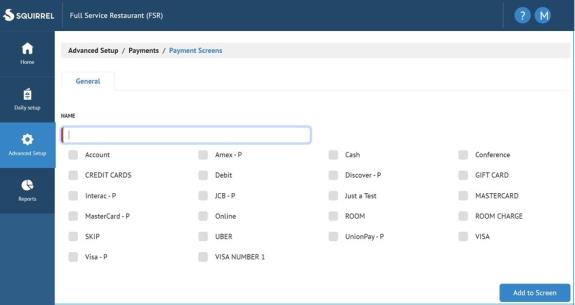
- In the Name field, enter a name for the payment screen.
- Select the payments you want to list on this screen.
- Click Add to Screen.
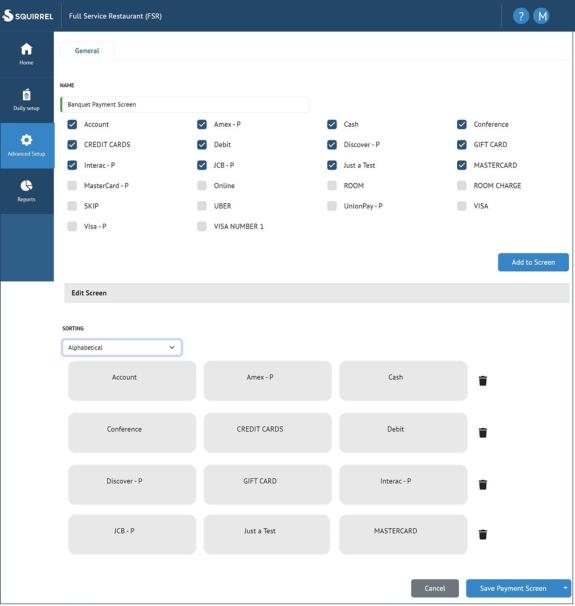
- Click Save Payment Screen.
- In Advanced Setup > Departments, select the department you want to assign the payment screen to.
- On the Edit Department page, use the Payment Screens drop-down to assign the payment screen to the department.
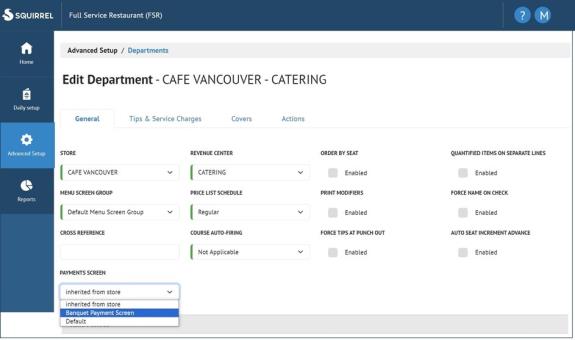
- Click Save Department.